Mastering Ajax, Part 3: Advanced requests and responses in AjaxGain a complete understanding of HTTP status codes, ready states, and the XMLHttpRequest object
|
|

|
| 3.0/5.0 (2 votes total) |
|
|
|
|
Brett McLaughlin
May 03, 2006
|
| Brett McLaughlin |
 In recent years, Brett McLaughlin has become one of the most
well-known authors and programmers in the Java and XML communities.
He's worked for Nextel Communications, implementing complex enterprise
systems; at Lutris Technologies, actually writing application servers;
and most recently at O'Reilly Media, Inc., where he continues to write
and edit books that matter. In recent years, Brett McLaughlin has become one of the most
well-known authors and programmers in the Java and XML communities.
He's worked for Nextel Communications, implementing complex enterprise
systems; at Lutris Technologies, actually writing application servers;
and most recently at O'Reilly Media, Inc., where he continues to write
and edit books that matter.
|
| Brett McLaughlin
has written 5 articles for JavaScriptSearch. |
| View all articles by Brett McLaughlin... |
This is part three of the Mastering AJAX series of articles. You can access the previous parts here (Part one) and here (Part two). For many Web developers, making simple requests and receiving simple responses is all they'll ever need, but for developers who want to master Ajax, a complete understanding of HTTP status codes, ready states, and the XMLHttpRequest object is required. In this article, Brett McLaughlin will show you the different status codes and demonstrate how browsers handle each and he will showcase the lesser-used HTTP requests that you can make with Ajax.
In the last article in this series, I provided a solid introduction to the XMLHttpRequest object, the centerpiece of an Ajax application that handles requests to a server-side application or script, and also deals with return data from that server-side component. Every Ajax application uses the XMLHttpRequest object, so you'll want to be intimately familiar with it to make your Ajax applications perform and perform well.
In this article, I move beyond the basics in the last article and concentrate on more detail about three key parts of this request object:
* The HTTP ready state
* The HTTP status code
* The types of requests that you can make
Each of these is generally considered part of the plumbing of a request; as a result, little detail is recorded about these subjects. However, you will need to be fluent in ready states, status codes, and requests if you want to do more than just dabble in Ajax programming. When something goes wrong in your application -- and things always go wrong -- understanding ready states, how to make a HEAD request, or what a 400 status code means can make the difference between five minutes of debugging and five hours of frustration and confusion.
XMLHttpRequest or XMLHttp: A rose by any other name
Microsoft™ and Internet Explorer use an object called XMLHttp instead of the XMLHttpRequest object used by Mozilla, Opera, Safari, and most non-Microsoft browsers. For the sake of simplicity, I refer to both of these object types simply as XMLHttpRequest. This matches the common practice you'll find all over the Web and is also in line with Microsoft's intentions of using XMLHttpRequest as the name of their request object in Internet Explorer 7.0. (For more on this, look at Part 2 again.)
I'll look at HTTP ready states first.
Digging deeper into HTTP ready states
You should remember from the last article that the XMLHttpRequest object has a property called readyState. This property ensures that a server has completed a request and typically, a callback function uses the data from the server to update a Web form or page. Listing 1 shows a simple example of this (also in the last article in this series -- see Resources).
Listing 1. Deal with a server's response in a callback function
function updatePage() {
if (request.readyState == 4) {
if (request.status == 200) {
var response = request.responseText.split("|");
document.getElementById("order").value = response[0];
document.getElementById("address").innerHTML =
response[1].replace(/\n/g, "<br />");
} else
alert("status is " + request.status);
}
}
This is definitely the most common (and most simple) usage of ready states. As you might guess from the number "4," though, there are several other ready states (you also saw this list in the last article -- see Resources):
* 0: The request is uninitialized (before you've called open()).
* 1: The request is set up, but not sent (before you've called send()).
* 2: The request was sent and is in process (you can usually get content headers from the response at this point).
* 3: The request is in process; often some partial data is available from the response, but the server isn't finished with its response.
* 4: The response is complete; you can get the server's response and use it.
If you want to go beyond the basics of Ajax programming, you need to know not only these states, but when they occur and how you can use them. First and foremost, you need to learn at what state of a request you encounter each ready state. Unfortunately, this is fairly non-intuitive and also involves a few special cases.
Ready states in hiding
The first ready state, signified by the readyState property 0 (readyState == 0), represents an uninitialized request. As soon as you call open() on your request object, this property is set to 1. Because you almost always call open() as soon as you initialize your request, it's rare to see readyState == 0. Furthermore, the uninitialized ready state is pretty useless in practical applications.
Still, in the interest of being complete, check out Listing 2 which shows how to get the ready state when it's set to 0.
Listing 2. Get a 0 ready state
function getSalesData() {
// Create a request object
createRequest();
alert("Ready state is: " + request.readyState);
// Setup (initialize) the request
var url = "/boards/servlet/UpdateBoardSales";
request.open("GET", url, true);
request.onreadystatechange = updatePage;
request.send(null);
}
In this simple example, getSalesData() is the function that your Web page calls to start a request (like when a button is clicked). Note that you've got to check the ready state before open() is called. Figure 1 shows the result of running this application.
Figure 1. A ready state of 0

When 0 is equal to 4
In the use case where multiple JavaScript functions use the same request object, checking for a ready state of 0 to ensure that the request object isn't in use can still turn out to be problematic. Since readyState == 4 indicates a completed request, you'll often find request objects that are not being used with their ready state still set at 4 -- the data from the server was used, but nothing has occurred since then to reset the ready state. There is a function that resets a request object called abort(), but it's not really intended for this use. If you have to use multiple functions, it might be better to create and use a request object for each function rather than to share the object across multiple functions.
Obviously, this doesn't do you much good; there are very few times when you'll need to make sure that open() hasn't been called. The only use for this ready state in almost-real-world Ajax programming is if you make multiple requests using the same XMLHttpRequest object across multiple functions. In that (rather unusual) situation, you might want to ensure that a request object is in an uninitialized state (readyState == 0) before making a new requests. This essentially ensures that another function isn't using the object at the same time.
Viewing an in-progress request's ready state
Aside from the 0 ready state, your request object should go through each of the other ready states in a typical request and response, and finally end up with a ready state of 4. That's when the if (request.readyState == 4) line of code you see in most callback functions comes in; it ensures the server is done and it's safe to update a Web page or take action based on data from the server.
It is a trivial task to actually see this process as it takes place. Instead of only running code in your callback if the ready state is 4, just output the ready state every time that your callback is called. For an example of code that does this, check out Listing 3.
Listing 3. Check the ready state
function updatePage() {
// Output the current ready state
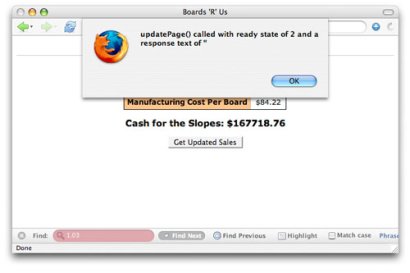
alert("updatePage() called with ready state of " + request.readyState);
}
If you're not sure how to get this running, you'll need to create a function to call from your Web page and have it send a request to a server-side component (just such a function was shown in Listing 2 and throughout the examples in both the first and second articles in this series). Make sure that when you set up your request, you set the callback function to updatePage(); to do this, set the onreadystatechange property of your request object to updatePage().
This code is a great illustration of exactly what onreadystatechange means -- every time the request's ready state changes, updatePage() is called and you see an alert. Figure 2 shows a sample of this function being called, in this case with a ready state of 1.
Figure 2. A ready state of 1

Try this code yourself. Put it into your Web page and then activate your event handler (click a button, tab out of a field, or use whatever method you set up to trigger a request). Your callback function will run several times -- each time the ready state of the request changes -- and you'll see an alert for each ready state. This is the best way to follow a request through each of its stages.
Browser inconsistencies
Once you've a basic understanding of this process, try to access your Web page from several different browsers. You should notice some inconsistencies in how these ready states are handled. For example, in Firefox 1.5, you see the following ready states:
* 1
* 2
* 3
* 4
This shouldn't be a surprise since each stage of a request is represented here. However, if you access the same application using Safari, you should see -- or rather, not see -- something interesting. Here are the states you see on Safari 2.0.1:
* 2
* 3
* 4
Safari actually leaves out the first ready state and there's no sensible explanation as to why; it's simply the way Safari works. It also illustrates an important point: While it's a good idea to ensure the ready state of a request is 4 before using data from the server, writing code that depends on each interim ready state is a sure way to get different results on different browsers.
For example, when using Opera 8.5, things are even worse with displayed ready states:
* 3
* 4
Last but not least, Internet Explorer responds with the following states:
* 1
* 2
* 3
* 4
If you have trouble with a request, this is the very first place to look for problems. Add an alert to show you the request's ready state so you can ensure that things are operating normally. Better yet, test on both Internet Explorer and Firefox -- you'll get all four ready states and be able to check each stage of the request.
Next I look at the response side.
Response data under the microscope
Once you understand the various ready states that occur during a request, you're ready to look at another important piece of the XMLHttpRequest object -- the responseText property. Remember from the last article that this is the property used to get data from the server. Once a server has finished processing a request, it places any data that is needed to respond to the request back in the responseText of the request. Then, your callback function can use that data, as seen in Listing 1 and Listing 4.
Listing 4. Use the response from the server
function updatePage() {
if (request.readyState == 4) {
var newTotal = request.responseText;
var totalSoldEl = document.getElementById("total-sold");
var netProfitEl = document.getElementById("net-profit");
replaceText(totalSoldEl, newTotal);
/* Figure out the new net profit */
var boardCostEl = document.getElementById("board-cost");
var boardCost = getText(boardCostEl);
var manCostEl = document.getElementById("man-cost");
var manCost = getText(manCostEl);
var profitPerBoard = boardCost - manCost;
var netProfit = profitPerBoard * newTotal;
/* Update the net profit on the sales form */
netProfit = Math.round(netProfit * 100) / 100;
replaceText(netProfitEl, netProfit);
}
Listing 1 is fairly simple; Listing 4 is a little more complicated, but to begin, both check the ready state and then grab the value (or values) in the responseText property.
Viewing the response text during a request
Like the ready state, the value of the responseText property changes throughout the request's life cycle. To see this in action, use code like that shown in Listing 5 to test the response text of a request, as well as its ready state.
Listing 5. Test the responseText property
function updatePage() {
// Output the current ready state
alert("updatePage() called with ready state of " + request.readyState +
" and a response text of '" + request.responseText + "'");
}
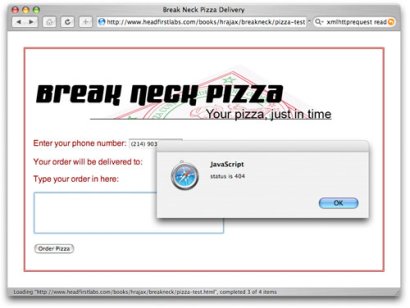
Now open your Web application in a browser and activate your request. To get the most out of this code, use either Firefox or Internet Explorer since those two browsers both report all possible ready states during a request. At a ready state of 2, for example, the responseText property is undefined (see Figure 3); you'd see an error if the JavaScript console was open as well.
Figure 3. Response text with a ready state of 2
At ready state 3 though, the server has placed a value in the responseText property, at least in this example (see Figure 4).
Figure 4. Response text with a ready state of 3

You'll find that your responses in ready state 3 vary from script to script, server to server, and browser to browser. Still, this is remains incredibly helpful in debugging your application.
Getting safe data
All of the documentation and specifications insist that it's only when the ready state is 4 that data is safe to use. Trust me, you'll rarely find a case where the data cannot be obtained from the responseText property when the ready state is 3. However, to rely on that in your application is a bad idea -- the one time you write code that depends on complete data at ready state 3 is almost guaranteed to be the time the data is incomplete.
A better idea is to provide some feedback to the user that when the ready state is 3, a response is forthcoming. While using a function like alert() is obviously a bad idea -- using Ajax and then blocking the user with an alert dialog box is pretty counterintuitive -- you could update a field on your form or page as the ready state changes. For example, try to set the width of a progress indicator to 25 percent for a ready state of 1, 50 percent for a ready state of 2, 75 percent for a ready state of 3, and 100 percent (complete) when the ready state is 4.
Of course, as you've seen, this approach is clever but browser-dependent. On Opera, you'll never get those first two ready states and Safari drops the first one (1). For that reason, I'll leave code like this as an exercise rather than include it in this article.
Time to take a look at status codes.
A closer look at HTTP status codes
With ready states and the server's response in your bag of Ajax programming techniques, you're ready to add another level of sophistication to your Ajax applications -- working with HTTP status codes. These codes are nothing new to Ajax. They've been around on the Web for as long as there has been a Web. You've probably already seen several of these through your Web browser:
* 401: Unauthorized
* 403: Forbidden
* 404: Not Found
You can find more (for a complete list, see Resources). To add another layer of control and responsiveness (and particularly more robust error-handling) to your Ajax applications, then you need to check the status codes in a request and respond appropriately.
200: Everything is OK
In many Ajax applications, you'll see a callback function that checks for a ready state and then goes on to work with the data from the server response, as in Listing 6.
Listing 6. Callback function that ignores the status code
function updatePage() {
if (request.readyState == 4) {
var response = request.responseText.split("|");
document.getElementById("order").value = response[0];
document.getElementById("address").innerHTML =
response[1].replace(/\n/g, "<br />");
}
}
This turns out to be a short-sighted and error-prone approach to Ajax programming. If a script requires authentication and your request does not provide valid credentials, the server will return an error code like 403 or 401. However, the ready state will be set to 4 since the server answered the request (even if the answer wasn't what you wanted or expected for your request). As a result, the user is not going to get valid data and might even get a nasty error when your JavaScript tries to use non-existent server data.
It takes minimal effort to ensure that the server not only finished with a request, but returned an "Everything is OK" status code. That code is "200" and is reported through the status property of the XMLHttpRequest object. To make sure that not only did the server finish with a request but that it also reported an OK status, add an additional check in your callback function as shown in Listing 7.
Listing 7. Check for a valid status code
function updatePage() {
if (request.readyState == 4) {
if (request.status == 200) {
var response = request.responseText.split("|");
document.getElementById("order").value = response[0];
document.getElementById("address").innerHTML =
response[1].replace(/\n/g, "<br />");
} else
alert("status is " + request.status);
}
}
With the addition of a few lines of code, you can be certain that if something does go wrong, your users will get a (questionably) helpful error message rather than seeing a page of garbled data with no explanation.
Redirection and rerouting
Before I talk in depth about errors, it's worth talking about something you probably don't have to worry about when you're using Ajax -- redirections. In HTTP status codes, this is the 300 family of status codes, including:
* 301: Moved permanently
* 302: Found (the request was redirected to another URL/URI)
* 305: Use Proxy (the request must use a proxy to access the resource requested)
Ajax programmers probably aren't concerned about redirections for two reasons:
* First, Ajax applications are almost always written for a specific server-side script, servlet, or application. For that component to disappear and move somewhere else without you, the Ajax programmer, knowing about it is pretty rare. So more often than not, you'll know that a resource has moved (because you moved it or had it moved), change the URL in your request, and never encounter this sort of result.
* And an even more relevant reason is: Ajax applications and requests are sandboxed. This means that the domain that serves a Web page that makes Ajax requests is the domain that must respond to those requests. So a Web page served from ebay.com cannot make an Ajax-style request to a script running on amazon.com; Ajax applications on ibm.com cannot make requests to servlets running on netbeans.org.
As a result, your requests aren't able to be redirected to another server without generating a security error. In those cases, you won't get a status code at all. You'll usually just have a JavaScript error in the debug console. So, while you think about plenty of status codes, you can largely ignore the redirection codes altogether.
Edge cases and hard cases
At this point, novice programmers might wonder what all this fuss is about. It's certainly true that less than 5 percent of Ajax requests require working with ready states like 2 and 3 and status codes like 403 (and in fact, it might be much closer to 1 percent or less). These cases are important and are called edge cases -- situations that occur in very unusual situations in which the oddest conditions are met. While unusual, edge cases make up about 80 percent of most users' frustrations!
Typical users forget the 100 times an application worked correctly, but clearly remember the time it didn't. If you can handle the edge cases -- and hard cases -- smoothly, then you'll have content users that return to your site.
Errors
Once you've taken care of status code 200 and realized you can largely ignore the 300 family of status codes, the only other group of codes to worry about is the 400 family, which indicates various types of errors. Look back at Listing 7 and notice that while errors are handled, it's only a very generic error message that is output to the user. While this is a step in the right direction, it's still a pretty useless message in terms of telling the user or a programmer working on the application what actually went wrong.
First, add support for missing pages. This really shouldn't happen much in production systems, but it's not uncommon in testing for a script to move or for a programmer to enter an incorrect URL. If you can report 404 errors gracefully, you're going to provide a lot more help to confused users and programmers. For example, if a script on the server was removed and you use the code in Listing 7, you'd see a non-descript error as shown in Figure 5.
Figure 5. Generic error handling
The user has no way to tell if the problem is authentication, a missing script (which is the case here), user error, or even whether something in the code caused the problem. Some simple code additions can make this error a lot more specific. Take a look at Listing 8 which handles missing scripts as well as authentication errors with a specific message.
Listing 8. Check for a valid status code
function updatePage() {
if (request.readyState == 4) {
if (request.status == 200) {
var response = request.responseText.split("|");
document.getElementById("order").value = response[0];
document.getElementById("address").innerHTML =
response[1].replace(/\n/g, "<br />");
} else if (request.status == 404) {
alert ("Requested URL is not found.");
} else if (request.status == 403) {
alert("Access denied.");
} else
alert("status is " + request.status);
}
}
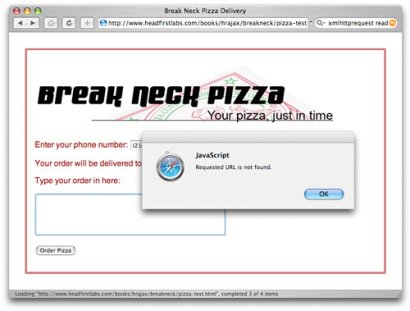
This is still rather simple, but it does provide some additional information. Figure 6 shows the same error as in Figure 5, but this time the error-handling code gives a much better picture of what happened to the user or programmer.
Figure 6. Specific error handling
In your own applications, you might consider clearing the username and password when failure occurs because of authentication and adding an error message to the screen. Similar approaches can be taken to more gracefully handle missing scripts or other 400-type errors (such as 405 for an unacceptable request method like sending a HEAD request that is not allowed, or 407 in which proxy authentication is required). Whatever choices you make, though, it begins with handling the status code returned from the server.
Additional request types
If you really want to take control of the XMLHttpRequest object, consider this one last stop -- add HEAD requests to your repertoire. In the previous two articles, I showed you how to make GET requests; in an upcoming article, you'll learn all about sending data to the server using POST requests. In the spirit of enhanced error handling and information gathering, though, you should learn how to make HEAD requests.
Making the request
Actually making a HEAD request is quite trivial; you simply call the open() method with "HEAD" instead of "GET" or "POST" as the first parameter, as shown in Listing 9.
Listing 9. Make a HEAD request with Ajax
function getSalesData() {
createRequest();
var url = "/boards/servlet/UpdateBoardSales";
request.open("HEAD", url, true);
request.onreadystatechange = updatePage;
request.send(null);
}
When you make a HEAD request like this, the server doesn't return an actual response as it would for a GET or POST request. Instead, the server only has to return the headers of the resource which include the last time the content in the response was modified, whether the requested resource exists, and quite a few other interesting informational bits. You can use several of these to find out about a resource before the server has to process and return that resource.
The easiest thing you can do with a request like this is to simply spit out all of the response headers. This gives you a feel for what's available to you through HEAD requests. Listing 10 provides a simple callback function to output all the response headers from a HEAD request.
Listing 10. Print all the response headers from a HEAD request
function updatePage() {
if (request.readyState == 4) {
alert(request.getAllResponseHeaders());
}
}
Check out Figure 7, which shows the response headers from a simple Ajax application that makes a HEAD request to a server.
Figure 7. Response headers from a HEAD request

You can use any of these headers (from the server type to the content type) individually to provide extra information or functionality within an Ajax application.
Checking for a URL
You've already seen how to check for a 404 error when a URL doesn't exist. If this turns into a common problem -- perhaps a certain script or servlet is offline quite a bit -- you might want to check for the URL before making a full GET or POST request. To do this, make a HEAD request and then check for a 404 error in your callback function; Listing 11 shows a sample callback.
Listing 11. Check to see if a URL exists
function updatePage() {
if (request.readyState == 4) {
if (request.status == 200) {
alert("URL exists");
} else if (request.status == 404) {
alert("URL does not exist.");
} else {
alert("Status is: " + request.status);
}
}
}
To be honest, this has little value. The server has to respond to the request and figure out a response to populate the content-length response header, so you don't save any processing time. Additionally, it takes just as much time to make the request and see if the URL exists using a HEAD request as it does to make the request using GET or POST than just handling errors as shown in Listing 7. Still, sometimes it's useful to know exactly what is available; you never know when creativity will strike and you'll need the HEAD request!
Useful HEAD requests
One area where you'll find a HEAD request useful is to check the content length or even the content type. This allows you to determine if a huge amount of data will be sent back to process a request or if the server will try to return binary data instead of HTML, text, or XML (which are all three much easier to process in JavaScript than binary data).
In these cases, you just use the appropriate header name and pass it to the getResponseHeader() method on the XMLHttpRequest object. So to get the length of a response, just call request.getResponseHeader("Content-Length");. To get the content type, use request.getResponseHeader("Content-Type");.
In many applications, making HEAD requests adds no functionality and might even slow down a request (by forcing a HEAD request to get data about the response and then a subsequent GET or POST request to actually get the response). However, in the event that you are unsure about a script or server-side component, a HEAD request can allow you to get some basic data without dealing with response data or needing the bandwidth to send that response.
In conclusion
For many Ajax and Web programmers, the material in this article seems fairly advanced. What is the value in making a HEAD request? What is really a case where you should handle a redirection status code explicitly in your JavaScript? These are good questions; for simple applications, the answer is that these advanced techniques are unlikely to be valuable.
However, the Web is no longer a place where simple applications are tolerated; users have become more advanced, customers expect robustness and advanced error reporting, and managers are fired because an application goes down 1 percent of the time.
It's your job then, to go beyond a simple application and that requires a more thorough understanding of XMLHttpRequest.
* If you can account for the various ready states -- and understand how they differ from browser to browser -- you'll be able to debug an application quickly. You might even come up with creative functionality based on a ready status and report on a request's status to users and customers.
* If you have a handle on status codes, you can set your application up to deal with a script's errors, unexpected responses, and edge cases. As a result, your application will work all of the time, rather than just in the situation where everything goes exactly right.
* Add to this the ability to make HEAD requests, check for the existence of a URL, and find out when a file was modified, and you can ensure that users get valid pages, are up-to-date on their information, and (most importantly) surprise them with just how robust and versatile your application is.
This article isn't going to make your applications flashy, help you highlight text with fading yellow spotlights, or feel more like a desktop. While these are all strengths of Ajax (and topics we'll cover in subsequent articles), they are to some degree just icing on the cake. If you can use Ajax to build a solid foundation in which your application handles errors and problems smoothly, users will return to your site and application. Add to this the visual trickery that I'll talk about in upcoming articles and you'll have thrilled, excited, and happy customers. (Seriously, you don't want to miss the next article!) ___________ Re-printed from http://www-128.ibm.com/developerworks/web/library/wa-ajaxintro1.html with permission. First
published by IBM developerWorks at http://www.ibm.com/developerWorks/ |


 FEEDBACK
 COMMENTS
 PRINT
PRINT SUBMIT ARTICLE
 RSS
RSS