| Brett McLaughlin |
 In recent years, Brett McLaughlin has become one of the most
well-known authors and programmers in the Java and XML communities.
He's worked for Nextel Communications, implementing complex enterprise
systems; at Lutris Technologies, actually writing application servers;
and most recently at O'Reilly Media, Inc., where he continues to write
and edit books that matter. In recent years, Brett McLaughlin has become one of the most
well-known authors and programmers in the Java and XML communities.
He's worked for Nextel Communications, implementing complex enterprise
systems; at Lutris Technologies, actually writing application servers;
and most recently at O'Reilly Media, Inc., where he continues to write
and edit books that matter.
|
| Brett McLaughlin
has written 5 articles for JavaScriptSearch. |
| View all articles by Brett McLaughlin... |
Previous parts in this series: Part 1, Part 2, Part 3, Part 4. Last month Brett introduced the Document Object Model,
whose elements work behind the scenes to define your Web pages. This
month he dives even deeper into the DOM. Learn how to create, remove,
and change the parts of a DOM tree, and take the next step toward
updating your Web pages on the fly! If you followed my discussion in the previous part of this series, then you got a first-hand look at what goes on
when a Web browser displays one of your Web pages. As I explained then,
when the HTML and CSS you've defined for your page is sent to a Web
browser, it's translated from text to an object model. This is true
whether the code is simple or complex, housed all in one file or in
separate files. The browser then works directly with the object model,
rather than the text files you supplied. The model the browser uses is
called the Document Object Model. It connects objects
representing the elements, attributes, and text in your documents. All
the styles, values, and even most of the spaces in your HTML and CSS are
incorporated into the object model. The specific model for a given Web page
is called the page's DOM tree.
Understanding what a DOM tree is, and even knowing how it
represents your HTML and CSS, is just the first step in taking control
of your Web pages. Next, you need to learn how to work with the DOM tree
for a particular Web page. For instance, if you add an element to the
DOM tree, that element immediately appears in a user's Web browser --
without the page reloading. Remove some text from the DOM tree, and that
text vanishes from the user's screen. You can change and interact with
the user interface through the DOM, which gives you tremendous
programming power and flexibility. Once you learn how to work with a
DOM tree you've taken a huge leap toward mastering rich,
interactive, dynamic Web sites.
Note that the following discussion builds on last month's "Exploiting the DOM for Web response;" if you haven't read that article, you might want to do so before you proceed here.
 |
Acronym pronunciation matters
In many ways, the Document Object Model could just as easily have
been called the Document Node Model. Of course, most people don't know
what the term node means, and "DNM" isn't nearly as easy to pronounce as "DOM," so it's easy to understand why the W3C went with DOM.
|
|
Cross browser, cross language
The Document Object Model is a W3C standard. Because of that, all modern Web browsers support
the DOM, at least to some degree. While there is some variance among
browsers, if you use core DOM functionality -- and pay attention to a
few special cases and exceptions -- your DOM code will work on any
browser in the same way. The code you write to modify a Web page in
Opera will work on Apple's Safari®, Firefox®, Microsoft® Internet
Explorer®, and Mozilla®.
The DOM is also a cross-language specification; in other words, you
can use it from most of the popular programming languages. The W3C defines several language bindings
for the DOM. A language binding is simply an API defined to let you use
the DOM for a specific language. For example, you can find well-defined
DOM language bindings for C, Java, and JavaScript. So you can use the
DOM from any of these languages. Language bindings are also available
for several other languages, although many of these are not defined by
the W3C, but instead by third parties.
In this series I'll focus on the JavaScript bindings into the DOM.
That makes sense because most asynchronous application development is
based on writing JavaScript code to run in a Web browser. With
JavaScript and the DOM, you can modify the user interface on the fly,
respond to user events and input, and more -- all using fairly
standardized JavaScript.
All that said, I do encourage you to check out the DOM language
bindings in other languages. For instance, you can use the Java
language bindings to work not only with HTML, but also XML, as I'll
discuss in a later article. So the lessons you'll learn here apply to
far more than HTML, in many more environments than just client-side
JavaScript.
The conceptual node
A node is the most basic object type in the DOM. In fact, as you'll
see in this article, almost every other object defined by the DOM
extends the node object. But, before you get too far into semantics,
you need to understand the concept that is represented by a node; then,
to learn the actual properties and methods of a node is a piece of cake.
In a DOM tree, almost everything you'll come across is a node. Every
element is at its most basic level a node in the DOM tree. Every
attribute is a node. Every piece of text is a node. Even comments,
special characters (like ©, which represents a copyright
symbol), and a DOCTYPE declaration (if you have one in your HTML or
XHTML) all are nodes. So before I get into the specifics of each of
these individual types, you really need to grasp what a node is.
A node is...
In simplest terms, a node is just one single thing in a DOM tree.
The vagueness of "thing" is intentional, because that's about as
specific as it gets. For example, it's probably not obvious that an
element in your HTML, like img, and a piece of text in
HTML, like "Scroll down for more details" have much in common. But
that's because you're probably thinking about the function of those individual types, and focusing on how different they are.
Consider, instead, that each element and piece of text in a DOM tree has a parent; that parent is either the child of another element (like when an img is nested inside a p
element), or is the top-most element in the DOM tree (which is a
one-time special case for each document, and is where you use the html element). Also consider that both elements and text have a type.
The type for an element is obviously an element; the type for text is
text. Each node also has some fairly well-defined structure to it: does
it have a node (or nodes) below it, such as child elements? Does it
have sibling nodes (nodes "next to" the element or text)? What document does each node belong to?
Obviously, much of this sounds pretty abstract. In fact, it might
even seem silly to say that the type of an element is ... well ... an
element. However, you need to think a bit abstractly to realize the
value of having the node as a common object type.
The common node type
The single task you'll perform more than any other in your DOM code
is navigating within the DOM tree for a page. For instance, you might
locate a form by its "id" attribute, and then begin to work with the elements and text nested within that form. There will be textual instructions, labels for input fields, actual input elements, and possibly other HTML elements like img elements and links (a elements). If elements and text are completely different types, then you have to write completely different pieces of code to move from one type to another.
Things are different if you use a common node type. In that case you can simply move from node to node, and worry about the type
of the node only when you want to do something specific with an element
or text. When you just move around in the DOM tree, you'll use the same
operations to move to an element's parent -- or its children -- as you
would with any other type of node. You only have to work specifically
with a node type, like an element or text, when you require something
specific from a certain type of node, like an element's attributes.
Thinking about each object in the DOM tree simply as a node allows you
to operate much more simply. With that in mind, I'll look next at
exactly what the DOM Node construct has to offer, starting with
properties and methods.
Properties of a node
You'll want to use several properties and methods when you work with
DOM nodes, so let's consider them first. The key properties of a DOM
node are:
nodeName reports the name of the node (see more below).nodeValue:gives the "value" of the node (see more below).parentNode returns the node's parent. Remember, every element, attribute, and text has a parent node.childNodes is a list of a node's children. When
working with HTML, this list is only useful when you're dealing with an
element; text nodes and attribute nodes don't have any children.firstChild is just a shortcut to the first node in the childNodes list.lastChild is another shortcut, this time to the last node in the childNodes list.previousSibling returns the node before the current node. In other words, it returns the node that precedes the current one, in this node's parent's childNodes list (if that was confusing, re-read that last sentence).nextSibling is similar to the previousSibling property; it turns the next node in the parent's childNodes list.attributes is only useful on an element node; it returns a list of an element's attributes.
The few other properties really apply to more generic XML documents,
and aren't of much use when you work with HTML-based Web pages.
Unusual properties
Most of the above-defined properties are pretty self-explanatory, with the exception of the nodeName and nodeValue properties. Rather than simply explain these properties, consider a couple of odd questions: What would the nodeName be for a text node? And, similarly, What would the nodeValue be for an element?
If these questions stumped you, then you already understand the
potential for confusion inherent in these properties. nodeName and nodeValue
really don't apply to all node types (this is also true of a few
of the other properties on a node). This illustrates a key concept: any
of these properties can return a null value (which sometimes shows up in
JavaScript as "undefined"). So, for example, the nodeName property for a text node is null (or
"undefined" in some browsers, as text nodes don't have a name. nodeValue returns the text of the node, as you would
probably expect.
Similarly, elements have a nodeName -- the
name of the element -- but the value of an element's nodeValue property is always null. Attributes have values for both the nodeName and nodeValue properties. I'll talk about these individual types a bit more in the next section, but since these
properties are part of every node, they're worth mentioning here.
Now take a look at Listing 1, which shows several of the node properties in action.
Listing 1. Using node properties in the DOM
    // These first two lines get the DOM tree for the current Web page,
    //   and then the <html> element for that DOM tree
    var myDocument = document;
    var htmlElement = myDocument.documentElement;

    // What's the name of the <html> element? "html"
    alert("The root element of the page is " + htmlElement.nodeName);

    // Look for the <head> element
    var headElement = htmlElement.getElementsByTagName("head")[0];
    if (headElement != null) {
      alert("We found the head element, named " + headElement.nodeName);
      // Print out the title of the page
      var titleElement = headElement.getElementsByTagName("title")[0];
      if (titleElement != null) {
        // The text will be the first child node of the <title> element
        var titleText = titleElement.firstChild;
        // We can get the text of the text node with nodeValue
        alert("The page title is '" + titleText.nodeValue + "'");
      }

      // After <head> is <body>
      var bodyElement = headElement.nextSibling;
      while (bodyElement.nodeName.toLowerCase() != "body") {
        bodyElement = bodyElement.nextSibling;
      }

      // We found the <body> element...

      // We'll do more when we know some methods on the nodes.
    }
|
 |
Methods of a node
Next up are the methods available to all nodes (as in the case of
node properties, I've omitted a few methods that don't really apply to
most HTML DOM operations):
insertBefore(newChild, referenceNode) inserts the newChild node before the referenceNode. Keep in mind you would call this on the intended parent of newChild.replaceChild(newChild, oldChild) replaces the oldChild node with the newChild node.removeChild(oldChild) removes the oldChild node from the node the function is run on.appendChild(newChild) adds the newChild node to the node this function is run on. newChild is added at the end of the target node's children.hasChildNodes() returns true if the node it's called on has children, and false if it doesn't.hasAttributes() returns true if the node it's called on has attributes, and false if there are no attributes.
You'll notice that, for the most part, all of these methods deal
with the children of a node. That's their primary purpose. If you're
just trying to grab the value of a text node or the name of an element,
you probably won't find yourself calling methods much, since you can
simply use the properties of a node. Listing 2 builds on the code from Listing 1 using several of the above methods.
Listing 2. Using node methods in the DOM
// These first two lines get the DOM tree for the current Web page,
    //   and then the <html> element for that DOM tree
    var myDocument = document;
    var htmlElement = myDocument.documentElement;

    // What's the name of the <html> element? "html"
    alert("The root element of the page is " + htmlElement.nodeName);

    // Look for the <head> element
    var headElement = htmlElement.getElementsByTagName("head")[0];
    if (headElement != null) {
      alert("We found the head element, named " + headElement.nodeName);
      // Print out the title of the page
      var titleElement = headElement.getElementsByTagName("title")[0];
      if (titleElement != null) {
        // The text will be the first child node of the <title> element
        var titleText = titleElement.firstChild;
        // We can get the text of the text node with nodeValue
        alert("The page title is '" + titleText.nodeValue + "'");
      }

      // After <head> is <body>
      var bodyElement = headElement.nextSibling;
      while (bodyElement.nodeName.toLowerCase() != "body") {
        bodyElement = bodyElement.nextSibling;
      }

      // We found the <body> element...

      // Remove all the top-level <img> elements in the body
      if (bodyElement.hasChildNodes()) {
        for (i=0; i<bodyElement.childNodes.length; i++) {
          var currentNode = bodyElement.childNodes[i];
          if (currentNode.nodeName.toLowerCase() == "img") {
            bodyElement.removeChild(currentNode);
          }
        }
      }
    }
|
Test me!
So far, you've seen just two examples, in Listings 1 and 2,
but they should give you all sorts of ideas for what's possible when
you start manipulating the DOM tree. If you want to try out the code so
far, just drop Listing 3 into an HTML file, save it, and load it into your Web browser.
Listing 3. An HTML file with some JavaScript code using the DOM
<html>
 <head>
  <title>JavaScript and the DOM</title>
  <script language="JavaScript">
   function test() {
    // These first two lines get the DOM tree for the current Web page,
    //   and then the <html> element for that DOM tree
    var myDocument = document;
    var htmlElement = myDocument.documentElement;

    // What's the name of the <html> element? "html"
    alert("The root element of the page is " + htmlElement.nodeName);

    // Look for the <head> element
    var headElement = htmlElement.getElementsByTagName("head")[0];
    if (headElement != null) {
      alert("We found the head element, named " + headElement.nodeName);
      // Print out the title of the page
      var titleElement = headElement.getElementsByTagName("title")[0];
      if (titleElement != null) {
        // The text will be the first child node of the <title> element
        var titleText = titleElement.firstChild;
        // We can get the text of the text node with nodeValue
        alert("The page title is '" + titleText.nodeValue + "'");
      }

      // After <head> is <body>
      var bodyElement = headElement.nextSibling;
      while (bodyElement.nodeName.toLowerCase() != "body") {
        bodyElement = bodyElement.nextSibling;
      }

      // We found the <body> element...

      // Remove all the top-level <img> elements in the body
      if (bodyElement.hasChildNodes()) {
        for (i=0; i<bodyElement.childNodes.length; i++) {
          var currentNode = bodyElement.childNodes[i];
          if (currentNode.nodeName.toLowerCase() == "img") {
            bodyElement.removeChild(currentNode);
          }
        }
      }
    }
  }
  </script>
 </head>
 <body>
  <p>JavaScript and DOM are a perfect match.
     You can read more in <i>Head Rush Ajax</i>.</p>
  <img src="http://www.headfirstlabs.com/Images/hraj_cover-150.jpg" />
  <input type="button" value="Test me!" onClick="test();" />
 </body>
</html>
|
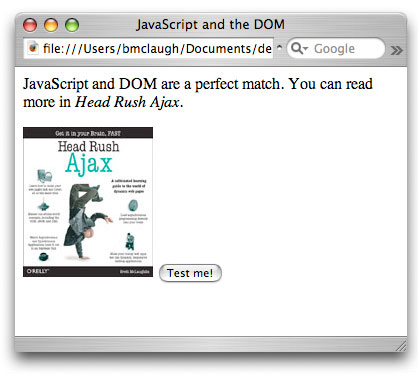
Once you've loaded this page into your browser, you should see something like
the page in Figure 1.
Figure 1. A simple HTML page with a button to run the JavaScript
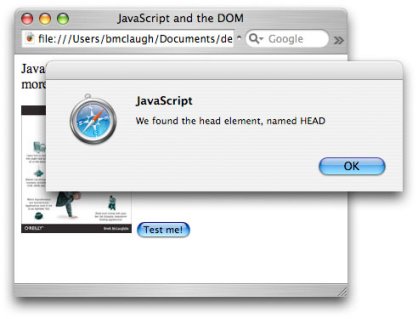
Click Test me! and you'll start to see the alert boxes, as shown in Figure 2.
Figure 2. Alert boxes showing the name of an element, using nodeValue
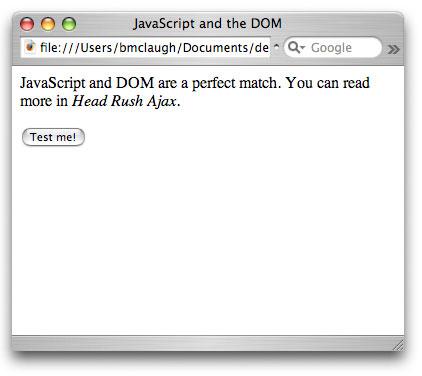
When the code is finished running the images are removed from the page in real-time, as shown in Figure 3.
Figure 3. Images removed in
real-time using JavaScript
API design notes
Take a look again at the properties and methods available on each
node. They illustrate a key point of the DOM for those comfortable with
object-oriented (OO) programming: the DOM isn't a very object-oriented
API. First, in many cases you'll use an object's properties directly,
rather than calling a method on a node object. There's no getNodeName() method, for example; you just use the nodeName
property directly. So node objects (as well as the other DOM objects)
expose a lot of their data through properties, and not just functions.
Second, the naming of objects and methods in the DOM might seem a
bit strange if you're used to working with overloaded objects and
object-oriented APIs, especially in languages like Java or C++. The DOM
has to work in C, Java, and JavaScript (to name a few languages), so
some concessions were made in the design of the API. For instance,
you'll see two different methods on the NamedNodeMap methods that look like this:
getNamedItem(String name)getNamedItemNS(Node node)
For OO programmers, this looks pretty odd. Two methods, with the same purpose, but one takes a String and one takes a Node.
In most OO APIs, you would use the same method name for both versions.
The virtual machine running your code would figure out which method to
run based on the type of object you passed into the method.
The problem is that JavaScript doesn't support this technique, called method overloading.
In other words, JavaScript requires that you have a single method or
function for a given name. So if you have a method called getNamedItem() that takes a string, then you can't have any other method or function named getNamedItem(),
even if the second version takes a different type of argument (or even
takes an entirely different set of arguments). JavaScript will report
an error if you do, and your code won't behave as you think it should.
In essence, the DOM consciously avoids method overloading and other
OO programming techniques. It does this to ensure that the API works
across multiple languages, including those that don't support OO
programming techniques. The end result is simply that you'll have to
learn a few extra method names. The upside is that you can learn the
DOM in any language -- for example, Java -- and know that the same
method names and coding constructs will work in other languages that
have a DOM implementation -- like JavaScript.
Let the programmer beware
If you're into API design at all -- or perhaps just are paying close
attention -- you might wonder: "Why are properties on the node type
that aren't common to all nodes?" That's a good question, and the
answer is more about politics and decision-making than any technical
reason. In short, the answer is, "Who knows! But it's a bit annoying,
isn't it?"
The property nodeName is meant to allow every type to
have a name; but in many cases, that name is either undefined or it's
some strange, internal name that has no value to programmers (for
example, in Java, the nodeName of a text node is reported
as "#text" in a lot of cases). Essentially, you have to assume that
error handling is left up to you. It's not safe to simply access myNode.nodeName
and then use that value; in many cases, the value will be null. So, as
is often the case when it comes to programming, let the programmer
beware.
Common node types
Now that you've seen some of the features and properties of a DOM
node (and some of its oddities as well), you're ready to learn about
some of the specific types of nodes that you'll work with. In most Web
applications, you'll only work with four types of nodes:
- The document node represents an entire HTML document.
- Element nodes represent HTML elements like
a or img. - Attribute nodes represent the attributes on HTML elements, like
href (on the a element) or src (on the img element). - Text nodes represent text in the HTML document, like "Click
on the link below for a complete set list." This is the text that
appears inside elements like
p, a, or h2.
When you deal with HTML, you'll work with these node types about 95%
of the time. So I'll spend the remainder of this month's article
discussing them in-depth. (When I discuss XML in a future article I'll
introduce you to some other node types.)
The document node
The first node type is one you'll use in almost every piece of DOM-based code you write: the document node. The document node
is actually not an element in an HTML (or XML) page, but the page
itself. So in an HTML Web page, the document node is the entire DOM
tree. In JavaScript, you can access the document node by using the document keyword:
// These first two lines get the DOM tree for the current Web page,
//   and then the <html> element for that DOM tree
var myDocument = document;
var htmlElement = myDocument.documentElement;
|
The document keyword in JavaScript returns the DOM tree for the current Web page. From there, you can work with all the nodes in the tree.
You can also use the document object to create new nodes, using methods like these:
createElement(elementName) creates an element with the supplied name.createTextNode(text) creates a new text node with the supplied text.createAttribute(attributeName) creates a new attribute with the supplied name.
The key thing to note is that these methods create nodes, but do not
attach them or insert them into any particular document. For this, you
have to use one of the methods you've already seen, like insertBefore() or appendChild(). So you might use code like the following to create and then add a new element to a document:
var pElement = myDocument.createElement("p");
var text = myDocument.createTextNode("Here's some text in a p element.");
pElement.appendChild(text);
bodyElement.appendChild(pElement);
|
Once you've used the document element to get access to a Web page's DOM tree, you're ready to start working with elements, attributes, and text directly.
Element nodes
Although you'll work with element nodes a lot, many of the
operations you need to perform on elements involve the methods and
properties common to all nodes, rather than methods and properties
specific to just elements. Only two sets of methods are specific to
elements:
- Methods that relate to working with attributes:
getAttribute(name) returns the value of the attribute named name.removeAttribute(name) removes the attribute named name.setAttribute(name, value) creates an attribute named name, and sets its value to value.getAttributeNode(name) returns the attribute node named name (attribute notes are covered below).removeAttributeNode(node) removes the attribute node that matches the supplied node.
- Methods that relate to finding nested elements:
getElementsByTagName(elementName) returns a list of element nodes with the supplied name.
These are all pretty self-explanatory, but check out some examples anyway.
Working with attributes
Working with attributes is fairly simple; for example, you might create a new img element with the document object, and element, and some of the methods from above:
var imgElement = document.createElement("img");
imgElement.setAttribute("src", "http://www.headfirstlabs.com/
  Images/hraj_cover-150.jpg");
imgElement.setAttribute("width", "130");
imgElement.setAttribute("height", "150");
bodyElement.appendChild(imgElement);
|
This should look pretty routine by now. In fact, you should start to
see that once you understand the concept of a node and know the methods
available, working with the DOM in your Web pages and JavaScript code
is simple. In the code above, the JavaScript creates a new img element, sets up some attributes, and then adds it to the body of the HTML page.
Finding nested elements
It's also easy to find nested elements. For example, here's the code I used to find and remove all the img elements in the HTML page from Listing 3:
      // Remove all the top-level <img> elements in the body
      if (bodyElement.hasChildNodes()) {
        for (i=0; i<bodyElement.childNodes.length; i++) {
          var currentNode = bodyElement.childNodes[i];
          if (currentNode.nodeName.toLowerCase() == "img") {
            bodyElement.removeChild(currentNode);
          }
        }
      }
|
You could achieve a similar effect using getElementsByTagName():
// Remove all the top-level <img> elements in the body
      var imgElements = bodyElement.getElementsByTagName("img");

      for (i=0; i<imgElements.length; i++) {
        var imgElement = imgElements.item[i];
        bodyElement.removeChild(imgElement);
      }
|
Attribute nodes
The DOM represents attributes as nodes, and you can always get an element's attributes using the attributes property of an element, as shown here:
// Remove all the top-level <img> elements in the body
      var imgElements = bodyElement.getElementsByTagName("img");

      for (i=0; i<imgElements.length; i++) {
        var imgElement = imgElements.item[i];

        // Print out some information about this element
        var msg = "Found an img element!";
        var atts = imgElement.attributes;
        for (j=0; j<atts.length; j++) {
          var att = atts.item(j);
          msg = msg + "\n  " + att.nodeName + ": '" + att.nodeValue + "'";
        }
        alert(msg);

        bodyElement.removeChild(imgElement);
      }
|
|
The strange case of attributes
Attributes are a bit of a special case when it comes to the DOM. On
the one hand, attributes really aren't children of elements like other
elements or text are; in other words, they don't appear "underneath" an
element. At the same time, they obviously have a relationship to an
element; an element "owns" its attributes. The DOM uses nodes to
represent attributes, and makes them available on an element through a
special list. So attributes are part of the DOM tree, but they often
don't appear on the tree. Suffice it to say that the relationship of
attributes to the rest of a DOM tree's structure is a little fuzzy.
|
|
It's worth noting that the attributes property is
actually on the node type, and not specifically on the element type. A
little odd, and it won't affect your coding, but it is worth knowing.
While it's certainly possible to work with attribute nodes, it's
often easier to use the methods available on the element class to work
with attributes. The methods are as follows:
getAttribute(name) returns the value of the attribute named name.removeAttribute(name) removes the attribute named name.setAttribute(name, value) creates an attribute named name and sets its value to value.
These three methods don't require you to work directly with
attribute nodes. Instead, you can just set and remove attributes and
their values with simple string properties.
Text nodes
The last type of node you need to worry about -- at least in working
with HTML DOM trees -- is the text node. Almost all of the properties
you'll commonly use to work with text nodes are actually available on
the node object. In fact, you'll generally use the nodeValue property to get the text from a text node, as shown here:
var pElements = bodyElement.getElementsByTagName("p");
for (i=0; i<pElements.length; i++) {
  var pElement = pElements.item(i);
  var text = pElement.firstChild.nodeValue;
  alert(text);
}
|
A few other methods are specific to text nodes. These deal with adding to or splitting the data in a node:
appendData(text) adds the text you supply to the end of the text node's existing text.insertData(position, text) allows you to insert data in the middle of the text node. It inserts the text you supply at the position indicated.replaceData(position, length, text) removes the
characters starting from the position indicated, of the length
indicated, and puts the text you supply to the method in the place of
the removed text.
What type of node?
Most of what you've seen so far assumes you already know what type
of
node you're working with, which isn't always the case. For example, if
you're navigating through a DOM tree, and working with the common node
types, you might not know whether you've moved to an element or text.
You might get all the children of a p element, and be unsure whether you're working with text, or a b element, or perhaps an img element. In these cases, you'll need to figure out what type of node you have before you can do much with it.
Fortunately, it's pretty simple to figure this out. The DOM node type defines several constants, like this:
Node.ELEMENT_NODE is the constant for the element node type.Node.ATTRIBUTE_NODE is the constant for the attribute node type.Node.TEXT_NODE is the constant for the text node type.Node.DOCUMENT_NODE is the constant for the document node type.
There are a number of other node types, but you'll rarely deal with
any but these four when processing HTML. I've also intentionally left
out the value for each of these constants, even though the values are
defined in the DOM specification; you should never deal directly with
the value, since that's what the constants are for!
The nodeType property
You can also use the nodeType property -- which is
defined on the DOM node type, so is available to all nodes -- to
compare a node to the above constants, as shown here:
var someNode = document.documentElement.firstChild;
if (someNode.nodeType == Node.ELEMENT_NODE) {
  alert("We've found an element node named " + someNode.nodeName);
} else if (someNode.nodeType == Node.TEXT_NODE) {
  alert("It's a text node; the text is " + someNode.nodeValue);
} else if (someNode.nodeType == Node.ATTRIBUTE_NODE) {
  alert("It's an attribute named " + someNode.nodeName
                        + " with a value of '" + someNode.nodeValue + "'");
}
|
This is a pretty simple example, but that's largely the point: getting the type of a node is
simple. What's trickier is figuring out what to do with the node once
you know what type it is; but with a firm knowledge of what the node,
text, attribute, and elements types offer, you're ready to take on DOM
programming yourself.
Well, almost.
A wrench in the works
It sounds like the nodeType property is
just the ticket to working with nodes -- it allows you to figure out
what type of node you're working with, and then write the code to deal
with that node. The problem is that the above-defined Node constants don't work properly on Internet
Explorer. So, if you use Node.ELEMENT_NODE,
Node.TEXT_NODE, or any of the other constants
in your code, Internet Explorer will return an error like the one you see in Figure 4.
Figure 4. Internet Explorer reports an error

Internet Explorer will report this error anytime you use the Node constants in your JavaScript. Because most of the world still uses Internet Explorer, you'd do well to avoid constructs like Node.ELEMENT_NODE or Node.TEXT_NODE
in your code. Even though Internet Explorer 7.0 -- the upcoming version
of Internet Explorer -- is supposed to rectify this problem, it will be
a number of years before Internet Explorer 6.x falls out of heavy use.
So avoid using Node; it's important that your DOM code (and your Ajax apps) work on all the major browsers.
In conclusion
|
Are you ready for the top?
If you really work to understand and eventually master the DOM,
you'll be at the very top of the Web programming skill level. Most Web
programmers know how to use JavaScript to write image rollovers or grab
values from a form, and some even are comfortable making requests and
receiving responses from a server (as you certainly should be after the
first few articles in this series). But actually changing the structure
of a Web page on the fly is not for the faint of heart or the inexperienced.
|
|
You've learned quite a bit in the last few articles in this series.
At this point, you should not sit back and wait for the next
article, expecting that I'll go into all sorts of clever uses for the
DOM tree. Explore how you can create fancy effects or slick interfaces
using the DOM is your homework now. Take what
you've learned in these last two articles and start to experiment and
play around. See if you can create a Web site that feels a bit more like
a desktop application, where objects move around on the screen in
response to a user's action.
Better yet, throw a border around every object on the screen, so you
can see where the objects in the DOM tree are, and start moving things
around. Create nodes and append them to existing child lists; remove
nodes that have lots of nested nodes; change the CSS style of a node,
and see if those changes are inherited by child nodes. The possibilities
are limitless, and every time you try something new, you'll learn
something new. Enjoy playing around with your Web pages.
Then, in the upcoming final part of this DOM-specific trilogy, I
will show you how to incorporate some cool and interesting
applications of the DOM into your programming. I'll stop
speaking conceptually and explaining the API, and show you some code.
Until then, come up with some clever ideas on your own, and see what you
can make happen all by yourself. ___________ Reprinted from http://www-128.ibm.com/developerworks/web/library/wa-ajaxintro5/ with permission, as a part of a series . First
published by IBM developerWorks at http://www.ibm.com/developerWorks/ |


 FEEDBACK
 COMMENTS
 PRINT
PRINT SUBMIT ARTICLE
 RSS
RSS